We all like to listen to music. Whether at home or outside, listening to music is a good pastime. As iPhone users, we can buy songs from the iTunes Store. In addition, we can also download music from other sources, and these songs are called non-purchased songs.
For the purchased songs, we can easily access them on iPhone and computer. With the help of iTunes, users can transfer purchased songs from iPhone to computer, or from computer to iPhone. However, it’s not that easy to transfer those non purchased songs. Due to copyright considerations, Apple does not allow users to transfer non-purchased items between two devices.
But fortunately, there are other ways to help you transfer non purchased music between iPhone and computer. You can first read then choose one method to follow according to your situation. Here we go.
Transfer Non Purchased Music via AOMEI MBackupper
First introduce the easiest way. AOMEI MBackupper is one professional iPhone backup & transfer tool specially designed for Windows PCs. It can help users transfer music, photos and videos from iPhone to computer and vice versa, from iPhone to another iPhone/iPad.
Key Features of Music Transfer
- It lets you preview and select the songs you want to transfer.
- It supports transferring purchased and non-purchased songs.
- It will not erase any existing songs or any other data on iPhone.
Here are the steps to transfer non purchased music from iPhone to computer:
- Download, install and launch AOMEI MBackupper > Connect iPhone to computer via USB cable.
- Click Transfer to Computer.
- Click the “+” icon > Choose the songs you want to transfer > Click OK to continue.
- Choose a storage path > Click Transfer to make it.

Transfer Non Purchased Music via iTunes
If you want to transfer non purchased music from computer to iPhone, iTunes can do you a favor. You should first add songs to iTunes library and then sync songs to iPhone. Please note that iTunes will erase existing music files on iPhone.
- Download and install the latest version of iTunes on computer > Run iTunes > Plug in your iPhone.
- Click the Device icon > Go to Summary > Uncheck the Automatically sync when this iPhone is connected option and check the option Manually manage music and videos > Click Apply.
- Click File tab > Click Add File to Library… > Choose the songs you need.
- Go to Music > Select Sync Music > Choose sync entire library or selected groups > Click Sync.

Transfer Non Purchased Music via Dropbox
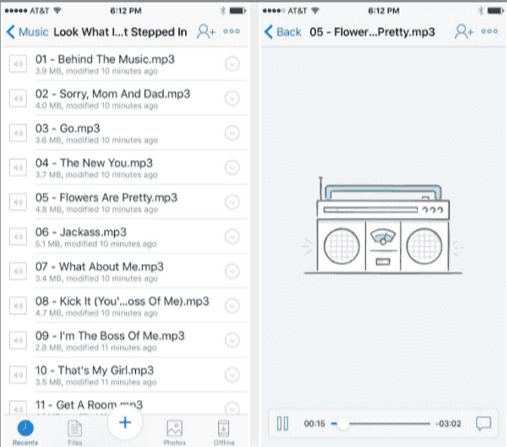
When connected to the Internet, users can access files in the cloud on any device. We can take advantage of this feature to transfer music between iPhone and computer. First upload songs to cloud on iPhone/computer and then download songs on computer/iPhone. Here we take Dropbox as an example to show you how to transfer non-purchased music from computer to iPhone.
- On computer: Open a browser and go to Dropbox.com > Sign in with your account > Upload songs.
- On iPhone: Download Dropbox app from App Store > Open it and sign in > Find the songs you uploaded before > Download songs for offline listening.

Transfer Non Purchased Music via Email
If you want to transfer one or two music files, you can send them by email. Mail can be sent from any device so you can transfer music from iPhone to computer or from computer to iPhone.
- On computer: Create an email > Add songs as an attachment > Send the mail to yourself.
- On iPhone: Open Mail app > Find the mail > Tap the song to load it > Click the Share button > Now you can open the song via the music app.

Final Words
There are 4 ways that can help you transfer non-purchased music between iPhone and computer.
If you want to transfer non-purchased music between iPhone and computer, then AOMEI MBackupper can be your best choice.
If you want to transfer non purchased music from computer to iPhone, iTunes helps you sync songs but it will erase existing songs on iPhone.
If you want to transfer non purchased music wirelessly, you can take advantage of cloud storage services like Dropbox, Google Drive, etc.
If you want to transfer one or two non purchased songs, you can add the music file as an attachment in email and send it to yourself.


