

Wondershare Dr.Fone is a premium utility application that is designed to recover your accidentally deleted or lost data, files from iOS devices. The software is capable of recovering all sorts of data which include photos, documents, audio, phonebook, texts, messages etc.
In simple words, Dr.Fone is a simple medium to fix all the issues related to lost or dead files on your iOS devices without any hustle.
So Let’s find out how this software functions and what pros and cons are associated with Dr.Fone:
User-Interface
As I have disclosed this numerous times, User-interface is one of the most significant elements of any software that cannot be ignored at any price. So as far as Dr. Fone’s user-interface goes, the software is quite easy to operate by any user with a basic computing knowledge.
The whole recovery procedure is wizard-based and you are not required to do any sort of advanced configuration to make this application work.
Let’s Start with Wondershare Dr.Fone:
Step 1: Primarily, you will be required to install the Dr.Fone software. Once it is installed, you can connect your iOS device (iPhone/iPad) with the computer using the USB cable that comes with your iOS device.
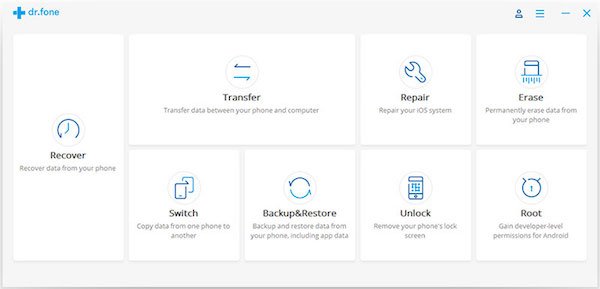
Then you can launch the Dr.Fone application on your computer screen and choose ‘Recover’ option.
Step 2: Once the software detects your device, it will display the window where you can select the type of data you want to recover like screenshot:

Note: It is recommended to install the latest version of iTunes before running Dr.Fone. Also, to avoid the auto-sync, you shouldn’t run iTunes when running Dr.Fone.
Step 3: Once you have selected the range of data for recovery, you need to simply click the ‘Start Scan’ option. The scanning process helps in scanning your iOS device for all the lost files/data and it might take several minutes to complete the action depending on the size and amount of data on your device.
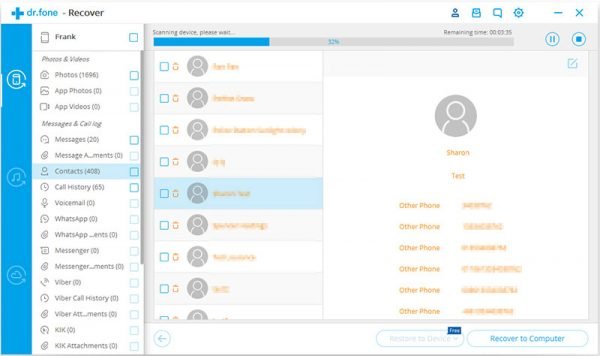
Also, you can hit ‘pause’ the scanning process if you found the data you were looking for.
Step 4: Once the scanning is done, you can see the lost data along with existing files and to avoid any redundancy, you can always go for “Only display the deleted items” option to see the deleted files only.
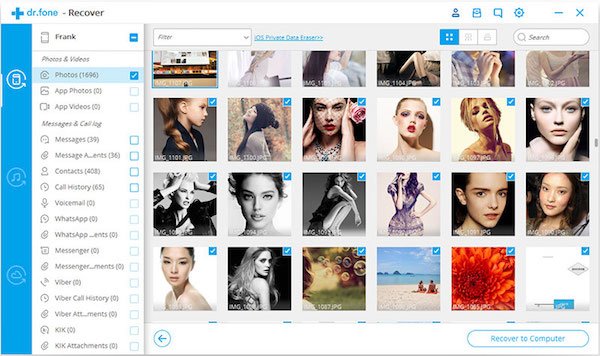
Once you find the data you need, you just have to put the check mark in front of those files. After then, click the “Recover” button at the bottom right of the window. By default, the recovered data will be saved to your computer. As for text messages, iMessage, contacts, or notes, when you click Recover, a pop-up will ask you to “Recover to Computer” or “Recover to Device”. If you want to put these messages back to your iOS device, click “Recover to Device”.
The software also assists in providing a solution to fix iTunes/iPhones error 3194. Addition to that, Dr.Fone can also help you in recovering the deleted text messages on your iPhone that include X/8.
Download
You can download the Wondershare Dr.Fone from here.
Verdict
Dr.Fone is a good way to find a solution for recovering your deleted files and data from iOS device directly. The software can help you in recovering a major portion of the lost data, but it might not recover the entire portion due to certain factors. Although the software is pretty capable of doing its job in an efficient and timely manner.
Pros
- Can Recover Majority of missing or dead files
- Simple to use
- Value for money
Cons
- May not recover entire missing files
- Costly


